If you have ever wondered how to repurpose one blog post without writing a dozen entirely new articles, start with a piece of content you already know is useful. A strong tutorial can become a short demonstration, an email lesson, a printable checklist, a Pinterest pin, a social discussion and more. The trick is not copying the same paragraph everywhere. It is finding a different way to help someone with the same core idea.
I've spent enough time researching, photographing, writing and maintaining blogs to know how frustrating it feels when a carefully prepared post gets one burst of attention and then disappears into the archives. Repurposing gives that work more chances to reach people who prefer to watch, listen, save or discuss rather than read a full article. Think of it like taking cuttings from a healthy plant: each new piece needs the right conditions to grow.
Below, we'll work through 13 practical formats, using one apple-preservation tutorial as a running example. You'll see what to create, how to adapt it, where to share it, what to measure and how to avoid making more work than the original post was worth.
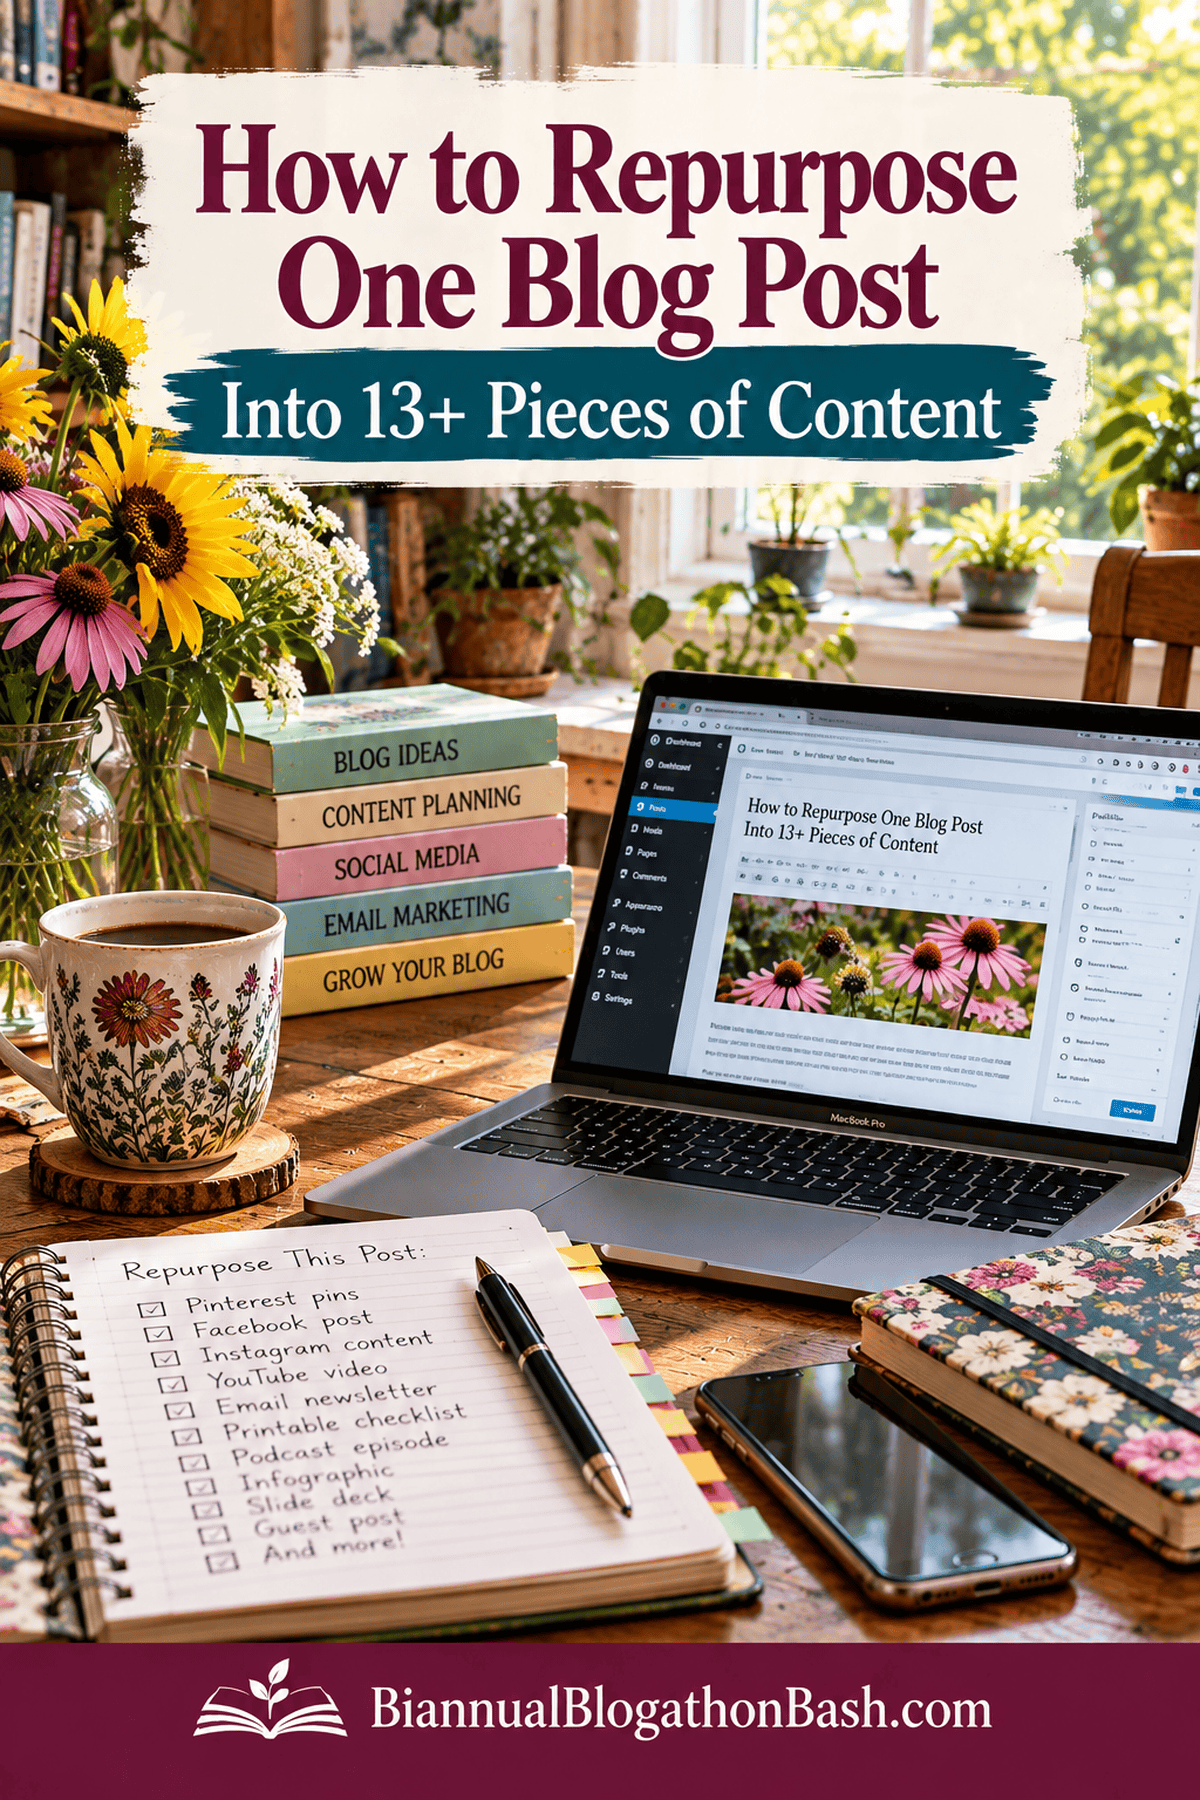
Why Repurposing Content Is Pure Gold
Repurposing content isn't about being lazy or repetitive - it's about being smart with your time and energy.
You're taking one solid idea and adapting it to fit how different people consume information.
- Some people love watching videos.
- Others prefer reading.
- Some scroll through social posts or pin infographics.
When you repurpose, you meet your audience where they already are - and you give your best content more chances to shine.
As a homesteader and blogger myself, I like to think of repurposing as preserving your hard work - kind of like canning tomatoes at the end of the season.
You're saving up the goodness so you can enjoy it later, in all sorts of ways.
Who benefits? A new blogger with a small archive can turn a carefully researched tutorial into a few focused promotional pieces. An established blogger can revive an evergreen article that still answers reader questions but no longer gets much attention. Authors can share lessons from their books, educators can turn demonstrations into handouts, and service providers can show prospective clients how they solve problems. The point is to extend useful work, not to create content for the sake of filling a calendar.
Why does it work? Someone searching Google may want a detailed answer; a Pinterest user may be collecting ideas for later; an email subscriber may want a timely reminder; and a social follower may prefer a quick example. These are different moments in the reader's journey. Each version should answer one question well, then offer the complete article when the reader needs more. Repurposing does not guarantee traffic or sales, but it gives one valuable resource more opportunities to be discovered.
Before You Repurpose: Check the Source Post
Start with an accurate, useful article that answers a real reader question. Check the instructions, photographs, dates, product details and outbound links first. If the source post is outdated, repurposing it only spreads the problem to more places. For recipes, preservation instructions, financial claims and other consequential topics, verify the details before turning them into a graphic or video.
- Identify the audience and problem. Write one sentence explaining who needs the article and what they will learn.
- Choose three to five teachable points. These become your video beats, carousel slides, email outline and checklist items.
- Choose a next step. Decide whether the audience should read the full tutorial, download a printable, subscribe to your email list or ask a question.
- Choose formats your audience actually uses. You do not need to make all 13 formats. Start with two or three you can produce well.
- Keep a source link and production record. Note the original URL, date reviewed, new asset filenames, publication dates and where each piece was shared.
For example, a post about preserving fall apples might teach readers how to prepare apples for freezing, dehydrating or refrigerator storage. A short video can demonstrate one method, a checklist can summarize supplies, and an email can help readers choose an approach. Each asset should link back to the complete, updated guide where readers can find the necessary details and cautions.
Step 1: Choose Your Core Piece of Content
Start with one blog post that's done well or that represents your expertise.
It could be a tutorial, a story, or an evergreen guide.
Examples:
- "How to Preserve Fall Apples Without Canning" (food preservation niche)
- "Beginner's Guide to Container Gardening for Small Spaces" (gardening niche)
- "Five Simple DIY Cleaning Recipes That Actually Work" (homesteading niche)
You'll use this as the base - everything else grows from here.
How to choose: Open your analytics and compare a few evergreen posts over the past several months. Look for articles with consistent search visits, useful reader comments, newsletter clicks, or questions you hear repeatedly. You can also choose a newer post that demonstrates your expertise even if it has not yet attracted traffic. Avoid starting with an article whose facts, photographs or instructions you cannot confidently verify.
Make a source brief: Record the original URL, the question the article answers, the intended reader, three important takeaways, one compelling example, and the next action you want readers to take. For an apple-preservation article, the reader might be a beginner facing a large harvest. Their question is what they can do with the apples without canning. Your key takeaways might be freezing, dehydrating and short-term refrigerator storage. This brief prevents each new asset from drifting away from the original promise.
If you already have video footage, my guide to turning old videos into new views and traffic offers more ways to reuse it. You can also explore visual content ideas for bloggers and Pinterest basics when planning additional formats.
Step 2: Create a Short Video Summary
Take the key takeaways from your post and turn them into a short video - 60 to 90 seconds for TikTok or Reels, or up to 3 minutes for YouTube Shorts.
You can do this with a simple talking-head video, a voiceover with photos, or even short clips of you demonstrating your tips.
Example:
If your post is about preserving apples, film yourself slicing, freezing, and labeling them. Add quick captions:
"Step 1: Slice evenly."
"Step 2: Freeze flat before bagging."
"Step 3: Label for easy storage."
Mention your full post in the caption and add your link in bio or description.
👉 SEO Tip: Use keywords naturally in your video title and caption. For instance, "How to Freeze Apples the Easy Way - No Canning Required."
Plan the shots before filming. Write a simple three-part outline: open with the problem, demonstrate one useful step, and finish by explaining where the complete instructions live. For apple preservation, show the washed fruit, the preparation method and the labeled finished package. Film close enough that viewers can actually see the work. If you do not want to appear on camera, hands-only demonstrations and your own photographs with a clear voiceover can work.
Publish with context. Add accurate on-screen captions, a concise description and a link where the platform permits it. Do not squeeze important safety details into a fast montage. A short clip should demonstrate one manageable part of the process, not pretend to replace the complete tutorial. After posting, note whether viewers watched, saved, commented or visited the full article. Use those responses to decide which part deserves a longer demonstration.
Step 3: Record a Podcast Episode
Podcasting is one of the easiest ways to repurpose a blog post.
Simply use your post as a script or outline.
Talk through the points conversationally - like you're chatting with a friend over coffee.
You can add extra context, personal stories, or behind-the-scenes insights you didn't include in the written version.
Example:
If your post is about "Starting a Victory Garden," share what inspired you to grow your first garden, what worked (and what didn't), and how you learned to deal with pests naturally.
👉 AEO Tip: Use clear, descriptive language when introducing your episode, such as "In today's episode, I'm breaking down how to start a victory garden from scratch - including soil prep, layout tips, and the easiest crops for beginners."
Choose an audio-friendly angle. A podcast is best when you can explain decisions, tell a useful personal story or answer questions without requiring listeners to see every movement. An episode about apples could compare when you choose freezing versus dehydrating, what equipment each method requires and what you learned from a past harvest. Detailed visual steps still belong in the written guide.
Make a recording outline: introduce the listener's problem, explain three main points, include one concrete example, summarize the next step and mention the original article URL. Record in a quiet room, listen back for unclear instructions and write episode notes with a link to the source post. If your article includes a chart, recipe or technical measurements, direct listeners to the written version rather than expecting them to memorize numbers.
Step 4: Create an Infographic
Visual learners love a good infographic!
Summarize the key points from your post using icons, short phrases, and step-by-step layouts.
Tools like Canva or Venngage make this easy - and you don't need to be a designer.
Example:
For a post about "Composting 101," make an infographic titled "What to Compost vs. What to Skip."
Use little icons of banana peels, eggshells, and paper towels on one side - and meat, dairy, and plastics on the other.
Pin it to Pinterest, post it on LinkedIn, and embed it back into your original blog post for extra SEO value.
Use an infographic for information that has a clear structure. Comparisons, decision trees, short processes and checklists work better than a graphic crowded with paragraphs. For the apple example, compare the purpose and equipment for freezing, dehydrating and refrigerator storage. Keep labels short enough to read on a phone and do not make claims the article cannot support.
Build it in this order: write the headline, identify three to five essential facts, choose a logical reading order, add your branding and original source URL, and check the result at mobile size. Write descriptive alt text when you upload it. Save an editable source file so you can correct details later. The infographic is a quick reference; the full article remains the place for nuanced instructions.
Step 5: Design a Carousel for Instagram or LinkedIn
Carousel posts grab attention because they invite readers to swipe through your ideas.
Take your main points and make each one its own slide.
Example:
If your blog post is "10 Ways to Save Money on the Homestead," make each slide one tip - from bartering with neighbors to making your own cleaning supplies. End the last slide with a call to action: "Read the full guide at ExperimentalHomesteader.com."
👉 SEO Tip: Add alt text to each image slide. For example: "homesteading money-saving tips graphic - make your own cleaning supplies."
Give every slide a job. Slide one states a specific problem or promise. Slides two through five each explain one idea. The final slide tells the reader what to do next. For example: 'A big apple harvest and no time to can?' followed by a slide on freezing, one on dehydrating, one on refrigerator options and one directing readers to the full tutorial.
Write for the platform and audience. A LinkedIn carousel for bloggers might discuss the workflow and business value of documenting a tutorial, while an Instagram carousel for home cooks would focus on the practical steps. Use large readable type, sufficient contrast and descriptions that make sense without the images. Review the slides in sequence on your phone before publishing; a carousel that looks attractive on a desktop may be unreadable on a small screen.
Step 6: Turn It Into a Live Stream Topic
If you're comfortable on camera, go live!
It doesn't have to be fancy - just you talking about your topic, sharing stories, and answering questions.
Live streams build authenticity and connection.
Example:
You could do a Facebook Live about "Easy Ways to Extend Your Garden Season." Show your cold frame setup, talk about your favorite crops for fall, and answer audience questions in real time.
Then, download that video and post it to YouTube, embed it in your blog, and clip short highlights for Reels or Shorts.
That's four content pieces from one video!

Pick one question you can answer live. Instead of reading your article aloud, demonstrate a step, compare tools or walk through a common mistake. Tell viewers what you will cover, what they need if they want to follow along, and how long you expect to be live. For a preservation topic, have supplies ready and explain which parts of the process require a longer written reference.
Prepare for interaction. Keep a short outline beside you, ask viewers what they have tried, and repeat questions before answering so replay viewers understand. Afterward, review the recording and identify useful clips or questions that could improve the original article. You can repurpose the replay into a short recap, but only if it adds value and does not repeat the same material unnecessarily.
Step 7: Make a Printable or Checklist
If your original post is educational, it's easy to create a downloadable version.
Example:
From a post about "How to Preserve Fall Herbs," you can create a "Herb Preservation Checklist" with drying, freezing, and oil infusion steps.
Add a cover page, some friendly visuals, and brand colors, then offer it as a lead magnet to grow your email list.
👉 AEO Tip: Use phrases like "Download your free herb preservation checklist" so voice search tools pick it up clearly when people ask, "Hey Siri, how can I preserve herbs for winter?"
Start with the task the reader needs to finish. A good printable is not a shrunk-down copy of the blog post. It might be a supply checklist, planning worksheet, measurement log or decision guide. For apple preservation, create a preparation and labeling checklist with space for the date, method and quantity. Include a clear reminder to consult the full article for the instructions.
Test the printable yourself. Print it in black and white, check that the font is readable, confirm that checkboxes and writing spaces are large enough, and try using it during the actual task. Offer it as a simple download, a subscriber resource or a relevant product depending on its depth and your business model. Be transparent about what is free and what requires signup or payment.
Step 8: Write an Email Teaser
Don't copy your whole post into your newsletter.
Instead, share a short teaser that leads back to your site.
Tell a quick story, share one valuable takeaway, and include a link to read the full post.
Example:
"I spent last weekend preserving apples, and it reminded me how grateful I am for freezer space! If you're wondering how to preserve your apple harvest without pulling out the canner, I just posted a full step-by-step guide on the blog. Check it out here → [link]."
That friendly tone builds connection and gets clicks.
Write to one person with one problem. An effective email can begin with a seasonal situation, share one helpful idea and invite the reader to the complete tutorial. For example: 'If your kitchen counter is filling up with fall apples, freezing some now may save you time later. I put together a guide comparing several ways to preserve them without canning.' Then link to the source article.
Make the email worth opening. Use a specific subject line, a short but meaningful explanation and one obvious primary link. Do not send the same pitch repeatedly to subscribers who have already seen it. When you revisit the article later, you can share a genuinely new discovery, updated method or reader question instead of recycling the identical email. Watch clicks and replies, not only opens, when deciding what resonated.
Step 9: Create Pinterest Pins (Lots of Them!)
Pinterest thrives on fresh visuals.
You can make multiple pin designs for the same post - different titles, colors, or images - and link them all to your original article.
Example Titles:
- "How to Preserve Apples Without Canning"
- "The Lazy Homesteader's Guide to Apple Preservation"
- "No-Canning Apple Storage Hack You'll Love"
👉 SEO Tip: Use keywords in your pin descriptions: "Learn how to preserve apples without canning. Perfect for busy homesteaders and gardeners who want to enjoy fall fruit all year long."
Develop distinct reasons to click. An answer pin can explain the direct benefit, a lifestyle pin can show the result in use, and a curiosity pin can raise a genuine question answered by the article. For the apple guide, those might focus on freezing apples, planning a fall harvest or choosing among preservation methods. Use authentic, relevant photographs and keep the headline readable.
Check the destination and the details. Every pin should lead to the page that actually answers its promise. Write a descriptive title and pin description, use a clear image and check how it crops on mobile. Do not make misleading claims, repeatedly upload near-identical designs or treat a new color as a new idea. Keep a record of each design and destination so you can measure which topic angle earns meaningful visits.
Step 10: Pull Out Social Media Quotes
Your post is full of quotable lines - don't let them go to waste!
Highlight one or two per week in branded quote graphics.
Pair them with photos of your garden, kitchen, or workspace.
Example:
From a gardening post:
"Seeds are tiny promises - and every season is a chance to keep them."
From a blogging post:
"You don't need to create more content. You need to make your existing content work harder."
These are relatable, shareable, and they reinforce your brand voice.
Choose useful observations rather than empty slogans. A quote should communicate a lesson, a surprising detail or an experience the audience recognizes. A line such as 'A good checklist should help someone finish the task, not make them reread the whole article' offers more value than 'Work smarter.' If you quote someone else, attribute them correctly and make sure you have the right to use the material.
Give the quote context. Pair it with a short explanation, a question or a link to the deeper discussion. A graphic can draw attention, but the caption should tell readers why the idea matters and what they can do with it. You can also post the same idea as plain text when the platform or audience responds better to conversation than graphics.
Step 11: Write a Thread or Mini-Series of Posts
On X (Twitter) or Facebook, you can break your article into a short series.
For instance, if your post is about "Repurposing Content," start a thread like:
1️⃣ Step 1: Pick one evergreen post.
2️⃣ Step 2: Turn it into a video.
3️⃣ Step 3: Share a quote graphic.
Each post builds on the previous one, keeping people coming back for more.
👉 SEO + Engagement Tip: Include one call to action at the end: "Read the full guide for all 12 repurposing ideas → [link]."
Map the sequence first. Start with the reader's problem, then share one takeaway per post, followed by an example and a final invitation to the original guide. For a series about repurposing content, you might cover choosing the source article on Monday, planning a video on Wednesday and creating an email on Friday. Each post should stand on its own while contributing to the larger lesson.
Don't make people chase missing steps. Include enough detail in each installment to be useful, link the posts where practical, and avoid publishing a long string of near-identical messages in one burst. A series works best when the topic naturally unfolds over time and you have something new to show or explain in each installment.
Step 12: Create a Slide Deck or Presentation
If your blog post is educational (and most are), it's easy to turn it into slides for workshops, webinars, or courses.
Example:
Your post "How to Start a Compost Pile" could become a PowerPoint for a local gardening class. You can even upload it to SlideShare for added visibility and backlinks.
That same deck can be repurposed again - as a downloadable PDF or part of an online course bundle.
Turn the article into a teachable sequence. Begin with what the audience will learn, then organize the material into a few concepts, demonstrations or examples. For a workshop on content repurposing, show a real source article, a planning worksheet, a short video outline, a pin concept and a simple measurement sheet. A slide should support what you say, not contain every paragraph you intend to read.
Think about where the slides will be used. A live workshop needs large text and room for discussion. A downloadable presentation may need more explanatory notes because no presenter is there to fill the gaps. Check image permissions, cite relevant sources and include a link to the original article or a useful handout. If the presentation becomes a paid class, add original instruction and activities beyond the free post.
Step 13: Update and Expand It into a New Post
After a few months, revisit your original article.
Add new data, experiences, or reader questions.
You can even turn it into a series:
Example:
"Preserving Apples Without Canning" could evolve into:
- "5 Common Mistakes to Avoid When Freezing Apples"
- "Best Containers for Freezing Fruit Without Waste"
Link all posts together for stronger SEO and longer reader sessions.
Related reading: LinkedIn for Bloggers explains how to adapt useful blog material for professional audiences, while Tumblr for Bloggers explores another way to reach readers.
Decide whether the topic needs an update or a genuinely separate article. If the original post has outdated instructions or missing answers, improve that URL first. If readers repeatedly ask a distinct question that deserves a full tutorial, a related article may make sense. For example, an overview of preserving apples could link to a detailed, independently useful article about preparing apples for the freezer.
Avoid competing with yourself. Give the new article a different reader question, scope and title, then connect the two with clear internal links. Do not publish lightly rewritten versions of the same guide just to increase your post count. Check which page should answer the broad question and which should handle the narrower one. This makes navigation easier for readers and keeps your site organized.
A Worked Example: One Apple Tutorial, Seven Useful Assets
Suppose your original article explains how to preserve fall apples without canning. Instead of publishing seven copies of the article, give each new piece a separate job:
- Short demonstration video: Show the preparation and freezer-packing process in a sequence of clear shots. Direct viewers to the complete guide for quantities, storage details and other methods.
- Answer Pinterest pin: Use a readable headline such as "Can You Freeze Fresh Apples?" and an authentic image of the process. The destination is the full article.
- Lifestyle Pinterest pin: Show the practical result, such as prepared apples ready for future baking, and explain the benefit.
- Curiosity Pinterest pin: Ask a real question the post answers, such as what to do with a large fall apple harvest.
- Email lesson: Explain how to choose between freezing and dehydrating, then link to the complete instructions.
- Printable checklist: Organize equipment, preparation steps and labeling reminders into something a reader can keep nearby.
- Discussion post: Ask followers which preservation method they use and share a helpful detail from your experience.
Notice that the same topic serves different intentions: learning a technique, saving a reference, deciding what to do with a harvest, or starting a conversation. That is the difference between repurposing and simply reposting.
A Realistic Four-Week Repurposing Schedule
Week 1: Audit and update the source article. Choose the audience, key lessons, call to action and two or three formats. Record the starting traffic or inquiries if you want a baseline.
Week 2: Produce the easiest assets first, perhaps an email and one Pinterest pin. Check spelling, accessibility, image permissions and links before publishing.
Week 3: Create one demonstration or carousel using the same approved outline. Change the opening and presentation to fit that format rather than reading the article word for word.
Week 4: Share an additional discussion prompt, review what generated relevant visits or conversations, and decide whether another format is worth the time. Repeat the process only when the source content and audience response justify it.
How to Measure Results and Avoid Duplicate-Content Problems
Give each format a clear purpose and a sensible destination. Use descriptive filenames and accurate alt text for images, captions for videos where practical, and working links to the original article. Do not publish substantially identical full articles across several websites without thinking about which page should be the primary source. A summary, demonstration, interview or new angle usually provides more value than a word-for-word duplicate.
Track the results that matter to your goal: visits to the original post, email signups, qualified inquiries, saves, replies or useful conversations. Compare these with the time it took to create each asset. Some posts are better suited to a checklist or demonstration than a podcast or slide deck. Let the response guide the next round instead of assuming more formats always means more traffic.
Bonus Tip: Combine Multiple Formats into a Campaign
Once you get comfortable repurposing, you can plan whole campaigns around one post.
For example:
- Write a blog post about "Making Homemade Yogurt."
- Create a short video of the process.
- Turn the steps into a printable recipe card.
- Share a quote graphic: "Homemade yogurt tastes like self-sufficiency in a jar."
- Email your subscribers a quick story about your first time making it.
Now you've got blog, video, email, and social media content - all consistent, all cohesive.
Repurposing Is About Working Smarter, Not Harder
When you start thinking of your blog posts as living, breathing content that can evolve into new forms, you'll never run out of things to share.
You'll spend less time creating from scratch and more time connecting with your audience - and that's where the real magic happens.
Whether you're teaching people to garden, preserve food, or build a blog of their own, the same rule applies: don't waste good material.
Just like a well-tended garden, the more care you put into repurposing your content, the richer your harvest will be.
So, the next time you publish something you're proud of, don't move on too quickly.
Let it grow - one format, one platform, and one audience at a time.
Frequently Asked Questions About Repurposing Blog Content
What does repurposing content mean?
A. Repurposing content simply means taking an existing piece of content - like a blog post, video, or podcast - and adapting it for a new format or platform.
For example, you might turn a how-to blog post about preserving apples into a short video for YouTube, a step-by-step printable checklist for your email subscribers, or a carousel post on Instagram. You're not rewriting the same thing over and over - you're reshaping your message so it fits how people prefer to consume information.
Why should I repurpose my blog posts?
A. Repurposing your content saves you time, boosts visibility, and strengthens your authority.
Most bloggers spend hours crafting one post, but only promote it once or twice. When you repurpose, you extend the lifespan of your work - just like freezing extra produce from your garden instead of letting it spoil.
Each repurposed format reaches a different segment of your audience - readers, listeners, watchers, and visual learners - without doubling your workload.
How often should I repurpose old blog posts?
A. A good rule of thumb is to review your blog archive every few months. Identify posts that are:
- Evergreen (still relevant year after year)
- Performing well in search or social traffic
- Or could use a little love and a fresh update
You can start by repurposing one piece per month and gradually build up from there. I like to treat repurposing like seasonal preserving - I revisit old posts each quarter and "put up" the ones that are still valuable.
What types of content can I repurpose from a single blog post?
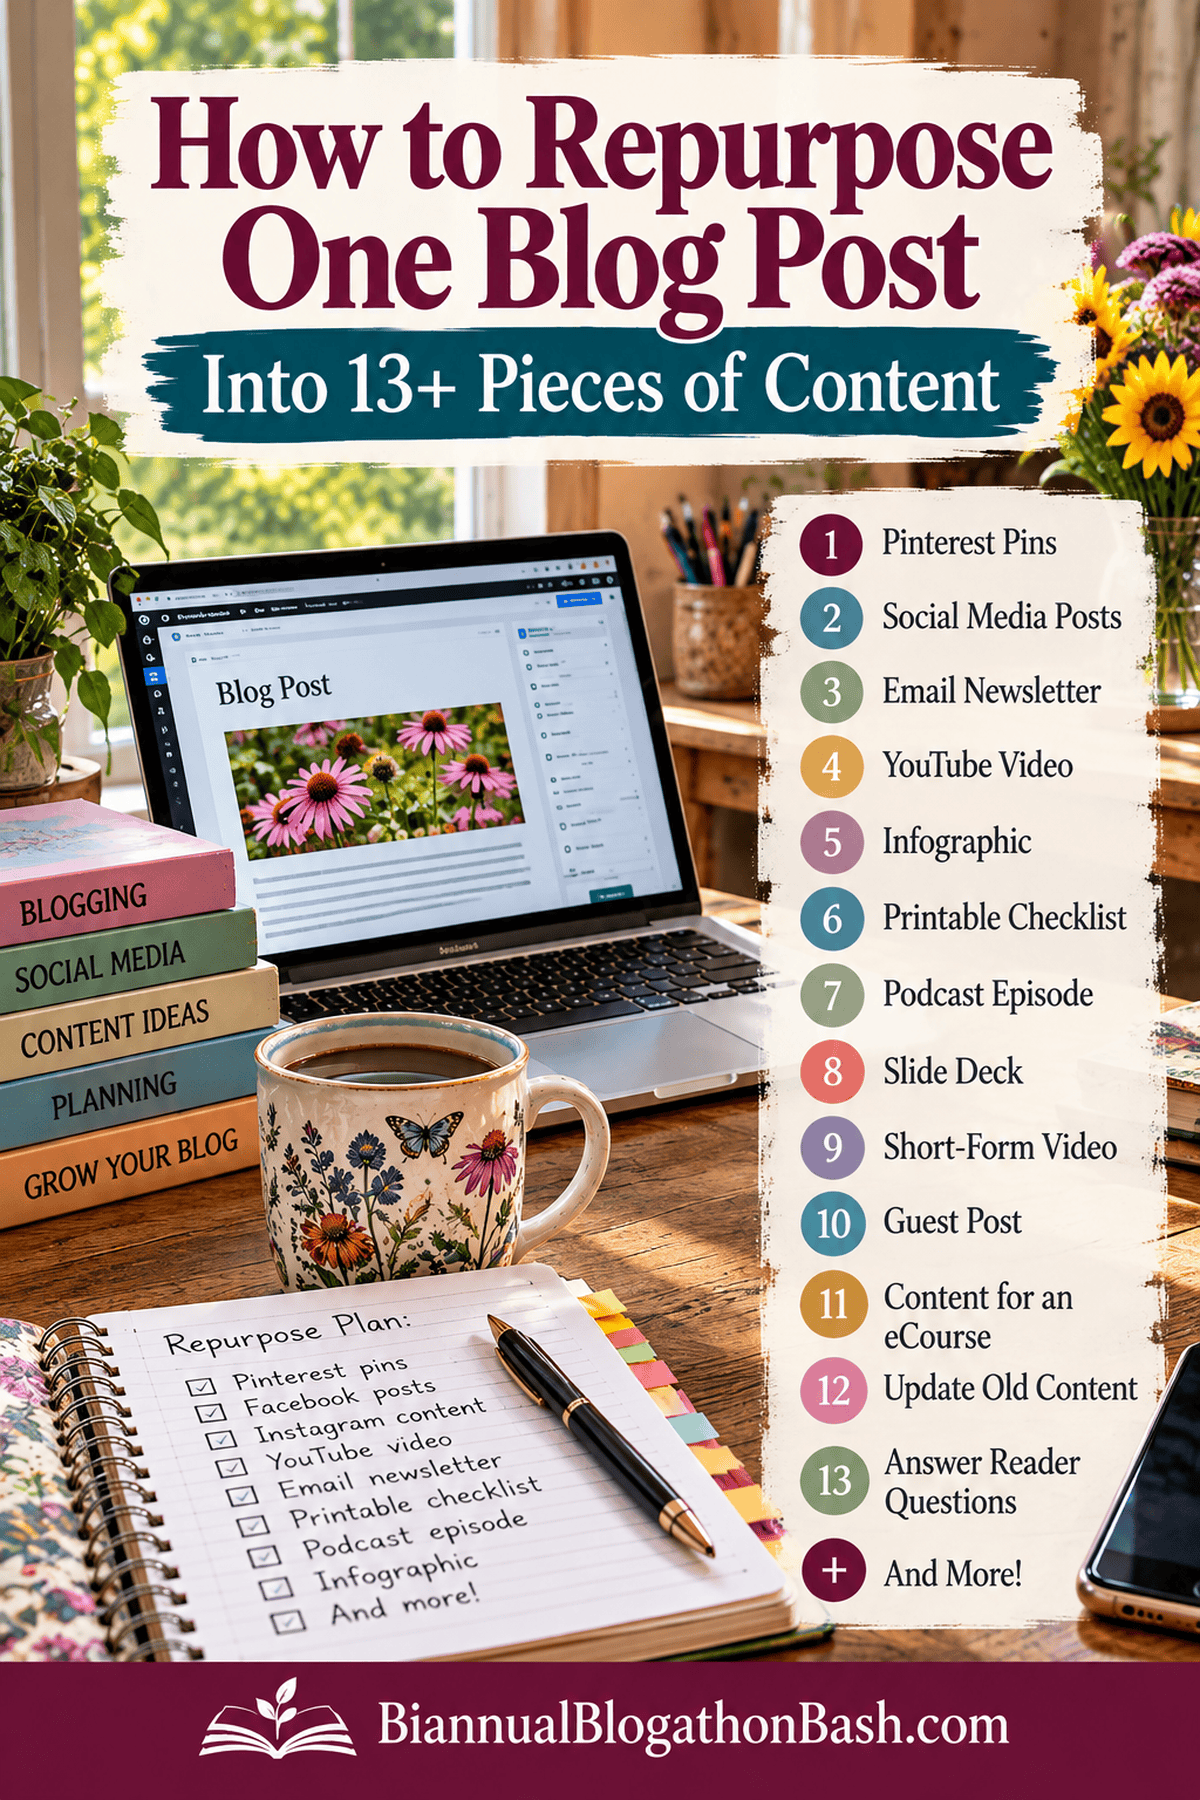
A. Nearly any post can become multiple content types. Here are a few ideas to get your creativity flowing:
- Short-form videos (Reels, Shorts, TikToks)
- Podcast episodes or live discussions
- Infographics and Pinterest pins
- Quote graphics for social media
- Carousel posts for Instagram or LinkedIn
- Printable checklists or worksheets
- Email newsletters or lead magnets
- Slide decks or webinar presentations
If you teach homesteading, gardening, or DIY, the options are endless - one post could easily become a mini-course, a workshop, or even part of a paid digital bundle.
What's the best tool for repurposing content?
A. There's no single "best" tool, but these are a few of my favorites:
- Canva for creating graphics, printables, and slides
- Descript or CapCut for editing videos and adding captions
- Otter.ai for transcribing videos into text for blog posts
- Repurpose.io for automatically sharing videos across platforms
- ActiveCampaign, ConvertKit or MailerLite for turning your posts into emails
The key isn't having all the tools - it's knowing how to use one well. Start simple and grow from there.
How do I make repurposed content SEO-friendly?
A. Here's the secret: every time you repurpose a post, include a clear keyword, internal link, and consistent branding.
For example:
- Use your focus keyword (like "repurpose blog content") naturally in titles and captions.
- Link all your repurposed pieces back to the original blog post to strengthen SEO signals.
- Add alt text to images and include transcripts for videos or podcasts.
When you do this consistently, your old posts begin supporting each other - kind of like companion planting in the garden!
How do I repurpose content without sounding repetitive?
A. The trick is to shift format and focus, not just copy and paste.
If your blog post teaches "how to start a compost pile," you might:
- Write a personal story about your first composting fail on Facebook
- Share a quick tip video about the right green-to-brown ratio
- Create an infographic of compost do's and don'ts
Each piece feels fresh, but they all tie back to the same core idea.
Can repurposing help me make more income from my blog?
A. Absolutely! Repurposing creates more entry points for potential readers, subscribers, and buyers.
Every repurposed format is another way to attract people to your products, printables, or affiliate links. For instance:
- A blog post about dehydrating herbs could lead to affiliate sales of a dehydrator.
- A video could point viewers to your herb preservation printable.
- A checklist could help grow your email list for future product launches.
Repurposing isn't just about exposure - it's about conversion.
How long does it take to repurpose a single post?
A. The first time you do it, expect it to take an hour or two - especially if you're creating visuals. But once you have a workflow, it gets much faster.
You can batch repurposing work by setting aside one day per month to reformat your best-performing content. It's kind of like a homesteading "processing day" - once you get into rhythm, you can preserve a lot in one sitting.
What's the best post to start with?
A. Start with one that already performs well - or one you're proud of but wish had more traction.
If you're a homesteading blogger, maybe that's your canning guide or homemade bread tutorial.
If you're a gardening blogger, pick a how-to post like "Growing Herbs Indoors All Year."
If you blog about blogging, choose something educational - like this one!
The key is to start small, measure what works, and repeat the process.
Final Takeaway
Repurposing content isn't about doing more - it's about doing better. It's how you take one strong idea and let it blossom across platforms, attracting readers, watchers, and listeners who might never have found you otherwise.
It's your content garden - and when you tend it wisely, it keeps producing long after you hit publish.






Leave a Reply